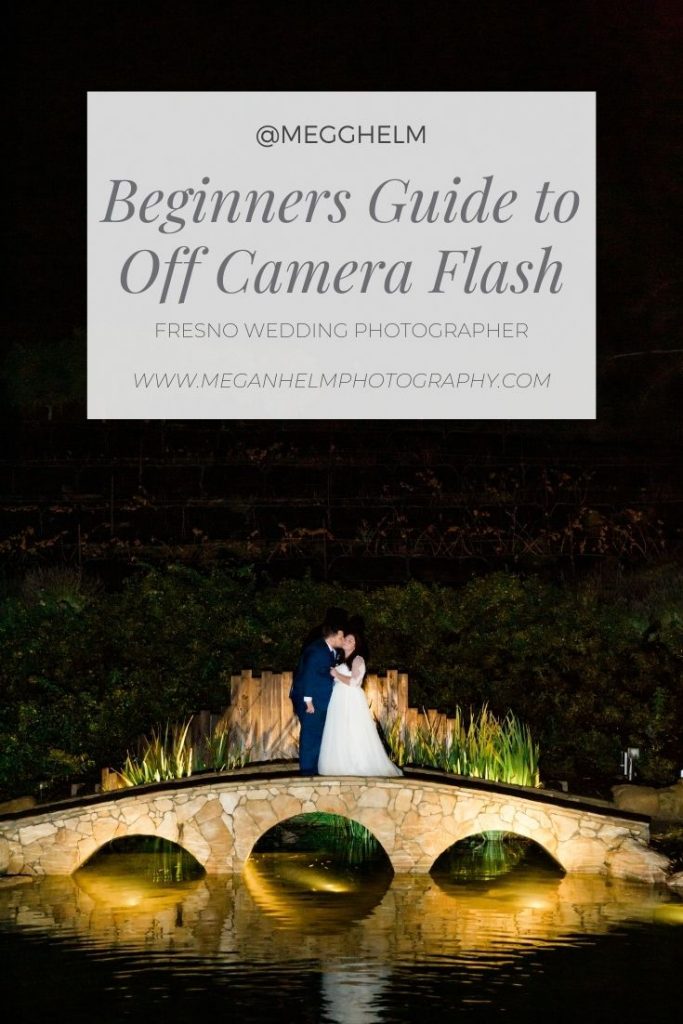
Are you intimidated by off camera flash?
Does shooting at night scare you?
Are you afraid of learning one more thing?
Do indoor events make you want to turn clients away?
That used to be me.
If the thought of shooting in low light makes your chest feel tight, then this blog is for you. I’m going to break down some basics (and I mean really really basic) tips for getting started with off camera flash photography to help you step up your game and feel confident shooting in any lighting scenario.
Let me start by saying I am no expert in using off camera flash.
I just started using OCF in late 2018 after one of my photog besties shared the flash gear she was using with me. I literally taught myself everything I currently do with my flash gear by reading the manual, watching a few youtube videos and practicing on my dog. As a wedding photographer, I just use it for the basics – getting me more light so I can capture a pretty photo with good light so my clients have great images, even when the lighting is less than ideal. I don’t do a lot of studio shoots with lighting or flash, and I never use it on an actual shoot like an engagement session. I am a natural light photographer, and I want my images to feel that way.
And this mindset of natural light held me back because I felt like I couldn’t use artificial light and still be a “natural light” photographer. That thinking was so wrong and really hindered what I was able to provide for my clients. Flash – on or off camera – can level up your photos and bring a much better experience to your clients!
So that being said, I’m here putting together a BASIC guide to help other photographers branch out into flash photography without feeling overwhelmed, confused and defeated when trying to work in low, difficult lighting situations.
I’ve seen photographers spend hundreds on a name brand flash equipment and no real idea of how to use it to their advantage. One photog literally said “It cost $600 and I don’t even know how to use it but I just leave it in M and it works“
Friends, if we want to be professionals, let’s actually do our homework and learn how to use the gear you have. Especially off camera flash because as a photographer, lighting is everything!
The name brand gear can do A LOT to help you navigate the flash game, but honestly I’ve never tried it other than rentals. And for me, at $650+ a pop for a flash – hard pass. What I have learned about OCF to be successful, I need at least 2, but 3 is my sweet spot. I want to make the most of my investment, which meant I did not choose super expensive gear. And can you imagine the horror if a guest were to knock over my stand with my $650 flash. I would literally cry! When it happens (and it WILL happen friends) I shrug it off, stand it back up and it keeps working.
Here’s my off camera flash gear:
2 Yongnuo YN560-TX Wireless Triggers*
Amazon Basics 7 Foot Light Stands
Speedlight Mount Brackets (to mount the flash onto the light stands)
Flash diffusers
Carrying bag
Total for all this (when I bought it) was around $250. I’ve since added another flash, bracket and an extra light stand because these flashes have Master and Slave capabilities (which I’ll talk about later) so I wanted that extra flash as a backup OR a third flash.
*I have two triggers so that I have a backup just in case!
2021 update for my off camera flash:
I love my off camera flash system, but the YN560 flash is ONLY an off camera flash. I have now upgraded my gear to the YN600EX-RT II which not only works on camera, but has the slave/master capabilities that the 560 has. It can actually control my 560 flashes if needed. If you do go the YN600 route, make sure you purchase the YN-E3-RT II trigger to use off camera flash and have the control from the trigger versus using an on camera flash as the trigger (aka Master flash)
Want more photo education tips? Join MHP’s FREE photo education FB group HERE!
Why do you need off camera flash?
It was hard for me to accept that I needed to find a way to photograph my clients when natural light isn’t an option. I was semi familiar with using flash on camera (not the kind that comes actually on the cheap DSLR models, but an actual flash – I think I originally had like a $30 flash from amazon and that’s all I knew)
When used correctly, flash will allow you to light your subject and properly expose them to capture a crisp image that doesn’t require you to do tons of work in post-production. You’ll need to practice to figure out what methods work best for you when using flash, but once you get the hang of it, you’ll wonder how you ever got through weddings without it!
If you’re expecting to read this blog and instantly become a pro, that’s not the goal. Navigating on and off camera flash takes a lot of practice to get it right and here are a few of my tips to get you started!
Location, location location!
The beauty of using off camera flash is that you don’t need to be standing in the same position as your flash when you fire the shot. This allows you to have a little fun and create different looks with your images. The image below was taken from the center of the floor, with two flash stands on either side of the room.

I prefer to shoot pretty centered on my subjects for things like reception toasts so we can see everyone’s reactions to different parts of the speeches. For dancing, I just move around and play with the flash so it creates fun effects when I have it directly in the lens or lights the guests enough to capture some really awesome candids!
Bouncing your light
You may have heard this term tossed around when referring to light. Bouncing light is essentially using what’s around you (preferably something neutral like a white wall or a ceiling) to literally bounce the light off of, rather than shooting with your flash straight onto your subject. Bouncing the light allows for the light to diffuse as it travels, creating an overall softer effect with more even lighting on your subject.
If you don’t have any walls around, you can also bounce off a person (I’ve literally used my second shooters to bounce before) or you can purchase a reflector (click here) and have your second shooter, assistant or the MOH hold it for you. Remember with the reflector you’ll want to make sure the return angle on your subject is right. Aim the flash up and back towards your reflector and aim the reflector down towards your subject.
What if you’re at an all outdoor venue with nothing to bounce?
This is when I’d use 3 flashes OR strictly on camera, but I definitely prefer the 3 off camera flashes to light the area properly.
Set one flash up real low (almost on the ground even) behind my subjects (because backlighting is important) and then I’d set up the other two flashes on either side of where my subjects are standing. If you can visualize a triangle, one point is behind the subject and the other two are out to the sides. This helps to light the background of your subject and expose them enough so they don’t look bright against an all black background. I’d also suggest setting your backlight flash at a higher setting than the two front flashes.
Off Camera Flash Settings
Have you ever tried to use flash and given up because all your photos look something like this?

Photo courtesy of SLR Lounge.
That’s because your camera settings are too fast for your flash. When you use flash, you’ve got another awesome perk – you can slow that shutter speed WAY down and still freeze most movement. With flash, you really should not have your shutter speed over 1/200, though some flashes can sync faster speeds. My sweet spot is 1/100-1/160, personally. Yes, even for dancing photos! It seems counter intuitive to stop the motion at that slow a speed, I know. Just trust me.
Plus, now you won’t have that black line at the bottom of all your photos.
The rest of your settings are up to your personal preference really. I like to keep my aperture around 2.0-2.8 so that I don’t miss the focus with a wider aperture setting. I also try and keep my ISO around 600-800 unless absolutely necessary.
I’ve heard some photogs say they don’t mind the grain, and I don’t either. However, I don’t like seeing tons of grain in a photo from blown ISO settings or by having to rescue a shot in post.
**For tips on my go-to settings when I shoot and a little insight on finding your photography style, click here**
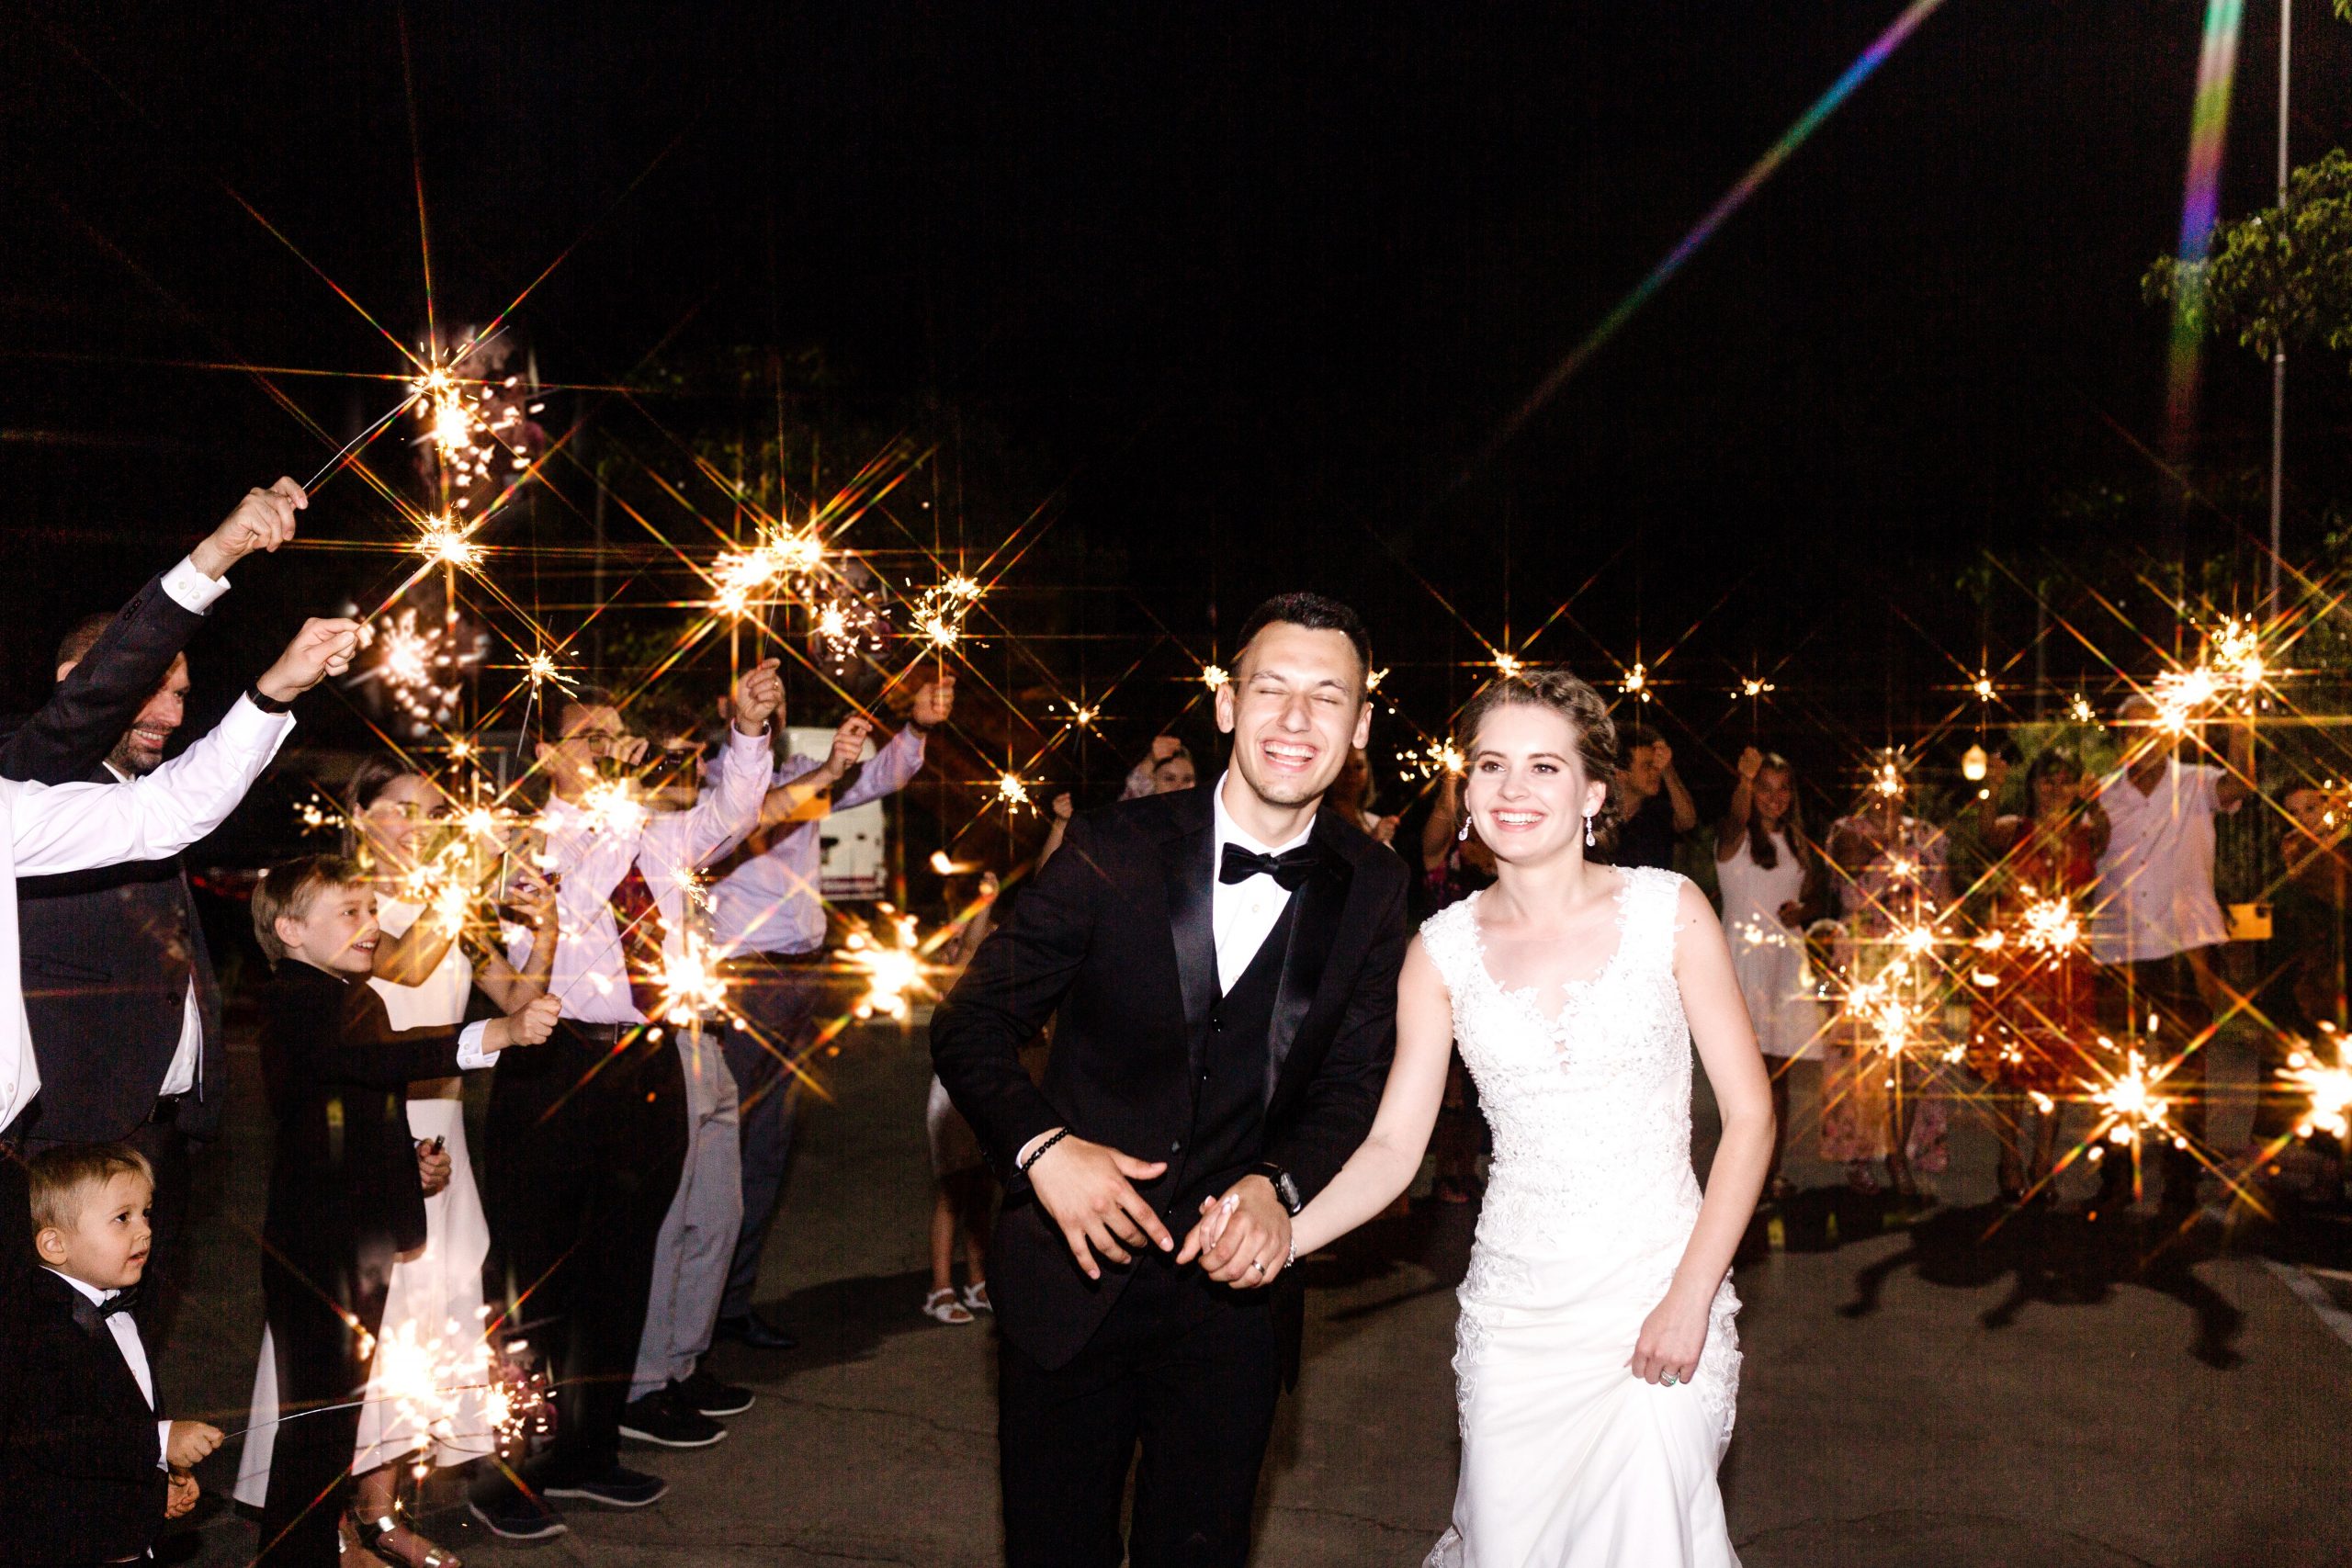
GEAR + SETTINGS: Canon 5DM3, Canon 35mm f/1.4 II, shot at f/2.8 and 1/160 shutter speed. I also had my star filter on the lens for a fun effect!
How do I set up my off camera flash?
The great thing is the flashes I purchased had decent instructions. And I think I looked up an article on Google or Youtube video to figure out what everything meant. The wireless trigger connects to your camera where the flash connect is. Earlier, I mentioned “Master” and “Slave” capabilities, which basically means your wireless trigger that is connected to your camera (or one of your flashes in mater mode) is the Master. It controls when the flashes in Slave mode will fire (i.e. when you click your shutter).
I have my Yongnuo 560 flashes on Multi Mode, RX (which is Slave Mode).
If you want your flash to control the other flashes on stands, you’ll want your main flash in Multi TX mode and the off camera flashes in Multi RX mode. Your slave flashes will mirror your settings on your camera as long as you have your settings right.
The option to have one flash control when the other flashes fire is great if you want to have a flash on your camera at all times. Personally, I prefer to have the Trigger on my camera rather than a Master flash, for two reasons. One, it’s a heck of a lot lighter to carry the small trigger around on my camera versus my flash. And two, I can literally control all my settings from the trigger. My trigger is capable of commanding 3 units (A, B and C). A is always the point of my triangle. B is always to my left and C is to my right. This way I know where they are and I can change the settings as needed while shooting. Basically, I can literally control the power of my flashes from anywhere in the room without having to walk and physically change the settings.
How does flash power work?
Flash power is basically like your shutter speed setting. The longer the shutter is open, the more light is let in. The same applies to the flash; the longer/stronger you have flash power set, the more light you’ll get. My flash has these options;
1/128, 1/64, 1/32, 1/16, 1/8, and 1/4
It also has a few micro adjustments within those speeds. Just like with your shutter speed, the faster the flash power, the less light it produces and vice versa. 1/128 is softer than 1/16. And being able to control that power with the wireless trigger is awesome because I can place my gear around a room but control their settings from one spot. Keep in mind the more power you’re asking your flash to produce, the longer it may need to “rest” between shots. I normally don’t ever shoot my flash stronger than 1/32, and I am usually shooting around 1/64 on my power. It also helps to have a fresh set of batteries.
PRO TIP: Remove the batteries from the flash when it’s in storage. It not only prevents batteries from leaking energy, but it’s good practice to store your gear without the batteries in them!
As I said earlier, I am a natural light photographer.
I prefer to use the lowest flash power I need to light my images, because I still want to create photographs that look natural. Here’s a link to my very first wedding that was all indoors except a few portraits. I was very nervous. However, having practiced with my OCF, I was able to nail the indoor photos without tons of grain all while keeping the colors natural and timeless.
See my post here!
I really hope this gave you some insight into navigating the world of off camera flash. I’ve had so much fun learning flash and being able to serve my wedding clients more effectively. Flash allows me to extend the time I spend shooting, still creating natural images in less than perfect lighting situations. I know how terrifying it can be to feel like you’re going to ruin a shot. But I encourage you to step outside your comfort zone. Make the investment in some gear and see if it’s something you even enjoy. You may decide OCF isn’t for you, and then you can spend your time educating your clients so they know how you work best.
Want more photo education tips? Join MHP’s FREE FB group HERE!
Download my Off Camera Flash Cheat Sheet HERE
*This post contains affiliate links and MHP may earn a small commission when you purchase items through these links.